POD Product Setup (Print On Demand)
For Print On Demand products with custom decorations and artwork:
1. Select HIT Promo Product
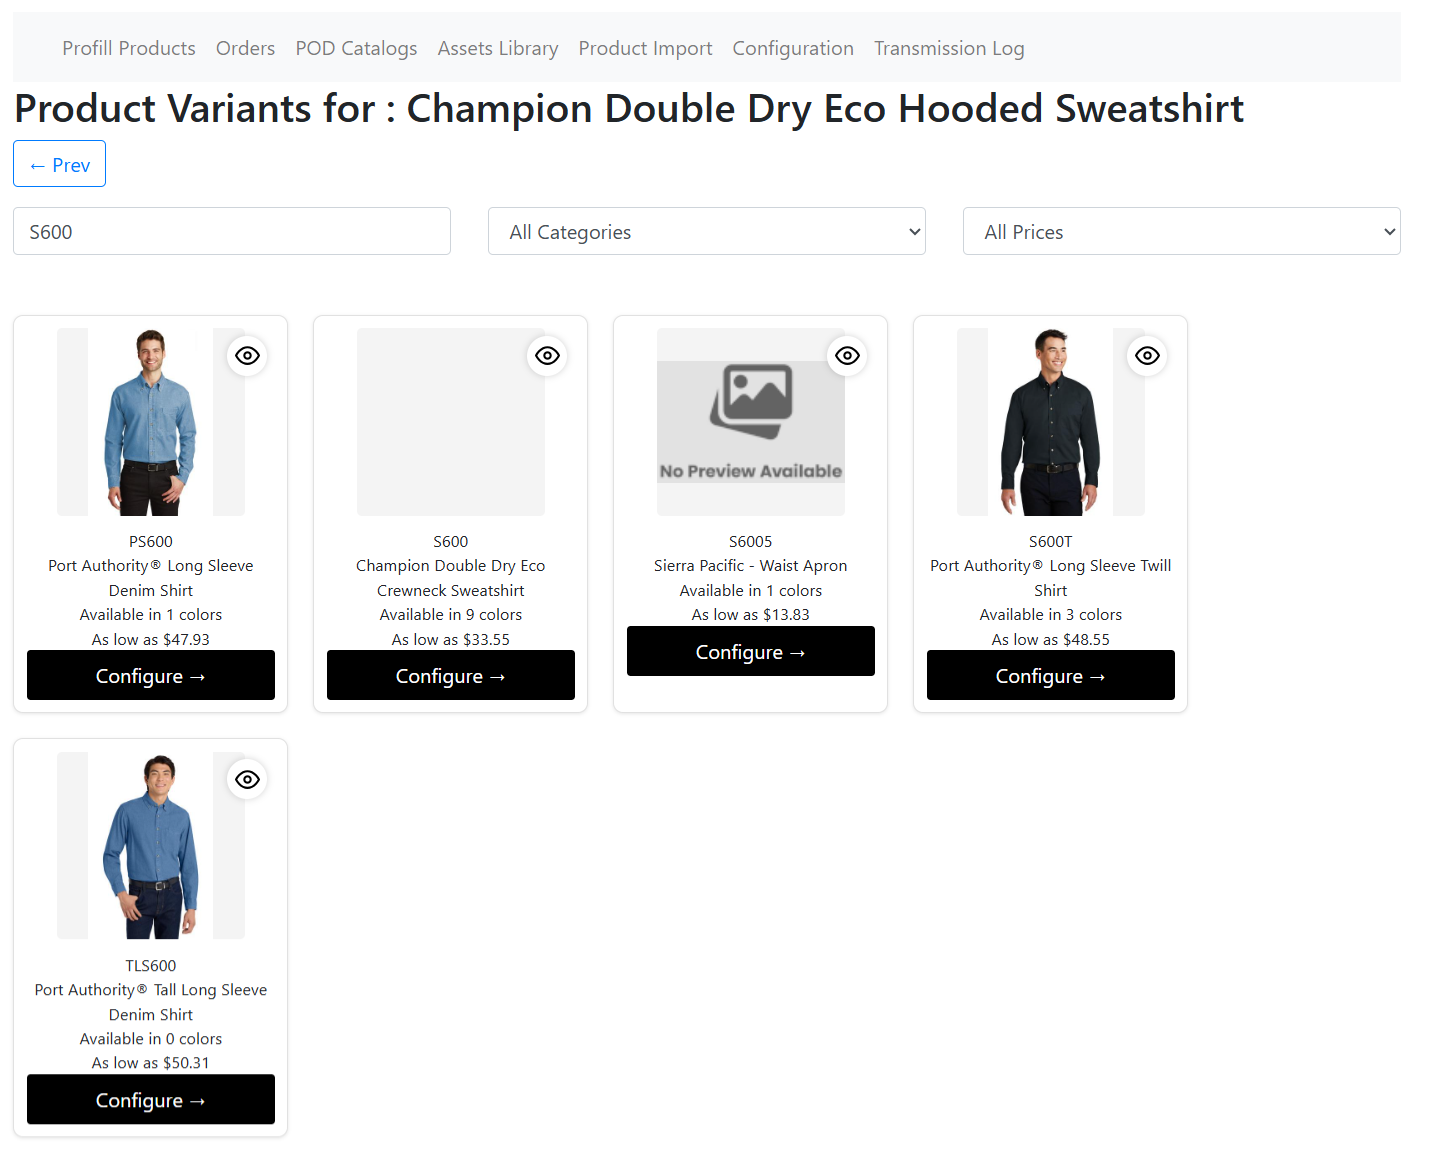
Search or filter HIT Promo products by:
- Product ID or Title
- Category (Headwear, Apparel, etc.)
- Subcategory (Caps, T-Shirts, etc.)
- Available Colors and Sizes
Click Configure on your selected HIT product
2. Configure Imprint Locations (at least 1 required)
Add imprint location configurations for the entire product. These apply to all variants. For each location:
- Select Location: Choose from available options (Front, Back, Left Chest, etc.)
- Choose Imprint Method: Select decoration type (Embroidery, Screen Print, etc.)
- Add Logo Description: Provide detailed description of the design (required)
- Set Imprint Colors: Add colors for your imprint (defaults to "See Art")
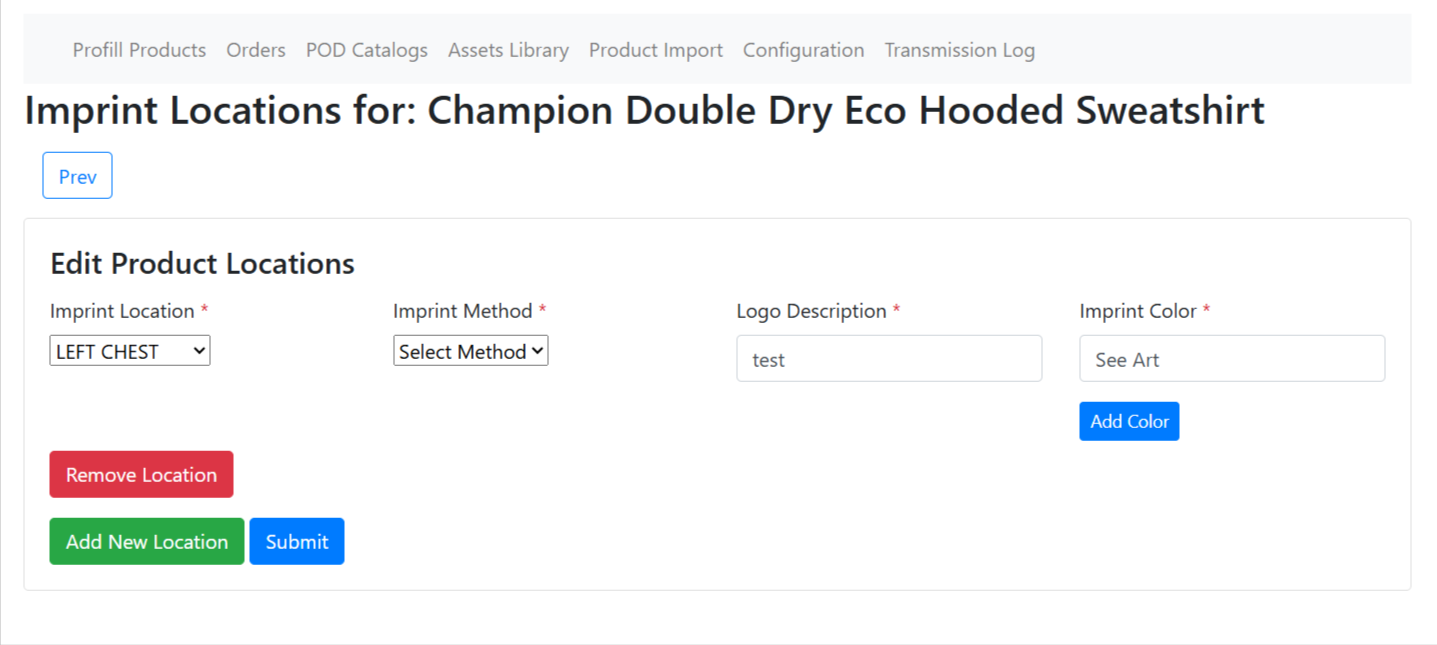
You can add, update, or delete multiple imprint locations. Click Save after configuring each location. Then click Next to proceed to the final step.
3. Variant Mapping & Artwork Selection
After configuring imprint locations, you'll map Bigcommerce variants to HIT product SKUs and select artwork from your Asset Library:
- Confirm Design Name: Edit product title if needed (max 29 characters)
- Configure Customization Options:
- Customization with Imagify-Design: Enable customer design customization
- Allow Only Asset Image for Customization: Restrict customers to pre-approved assets only
- Map All Variants to HIT SKUs: For each Bigcommerce variant, select the corresponding HIT product SKU (color/size match)
- Add Variant Artwork (Optional): Check "Add Art Files" for any variant
- Opens modal showing all configured locations
- Click "Add File" for each location to open Asset Library
- Select artwork from your Asset Library
- Control artwork lock status (locked = customers can't modify)
- Switch between variants using the sidebar
- Important: If adding artwork for one size of a color, ALL sizes of that color must have artwork
- Upload Location Images: For each configured imprint location (required)
- Click "Add File" to open Asset Library
- Select mockup image showing design placement
- Enable Product Customization: Per-location control
- Disabled until global customization is enabled and image is uploaded
- Check to allow customers to customize this specific location
- Uncheck to lock the location (design-only)
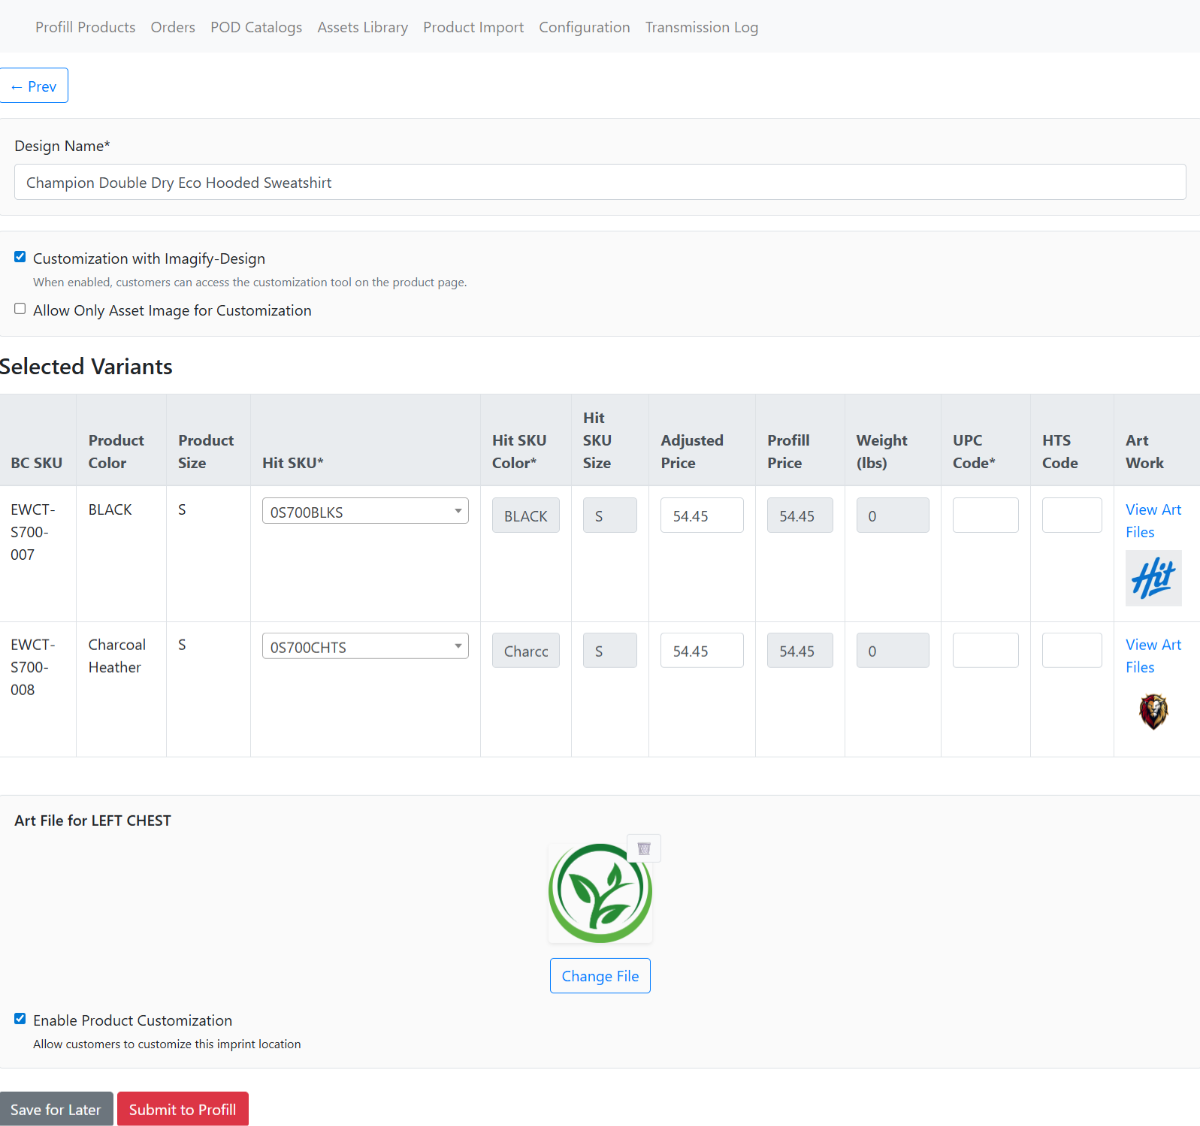
Required: All variants must be mapped to HIT SKUs, and all imprint locations must have artwork uploaded before submitting.
4. Submit Configuration
Click "Submit to Profill" button to save the configuration. The system will:
- Upload all art files to secure storage
- Save your product configuration in the app
- Set product status to "Pending Approval"
- Save all location-specific decorations
- Store variant-to-HIT SKU mappings
5. Check Approval Status
After saving the configuration:
- Navigate to the product info page by clicking on the product from the Products list
- Click the "Sync Product" button to check approval status
- If approved, status changes to "Ready For Order"
- Product is now ready to receive customer orders
Configuration Complete!
Once approved by Profill, your POD product is ready to receive orders with custom decorations. All art files are uploaded and imprint locations are configured. You can enable the Product Customization Tool from the product info page.
Important: Artwork Best Practices
- Upload assets to Asset Library first: All artwork (variant and location images) must be selected from Asset Library — no direct uploads
- High resolution: Use minimum 300 DPI for best print quality
- Vector formats preferred: Upload .ai, .eps, .svg when possible
- Transparency: Use PNG format for transparent backgrounds
- File size: Maximum 10MB per file in Asset Library
- Color validation: If adding artwork for one size of a color, ALL sizes of that color require artwork
- Descriptive names: Name files clearly before uploading to Asset Library for easy selection